Automotive locksmiths working on late-model Volkswagen Group (VAG) vehicles know that safely accessing modern key circuit boards can be a risky, tedious process. To address this challenge, Yanhua has introduced a specialized hardware solution:Vtool 5C/5D Key Cutting Kits.
This guide details what this tool kit offers, its primary features, and how it upgrades your bench workflow.
What is Vtool 5C/5D Key Cutting Kits?
Yanhua Vtool 5C 5D kits are professional-grade, non-destructive tools engineered specifically for opening and removing the outer shells of Volkswagen, Audi, and Porsche 5C and 5D smart keys.
Traditionally, opening these securely sealed casings risked slipping and destroying the internal PCB or electronic components.
Vtool kit allows locksmiths to safely open the casing to read data, write data, or perform chip tuning and key programming without compromising the internal transponder board.
Key Features & Tool Functionality
- Standardized Shell Removal:Provides a precise, guided method for splitting key casings, completely eliminating the risk of damaging sensitive internal electronics.
- VAG-Specific Engineering:Tailored to fit the exact geometry and sealing methods of modern Volkswagen, Audi, and Porsche smart key profiles.
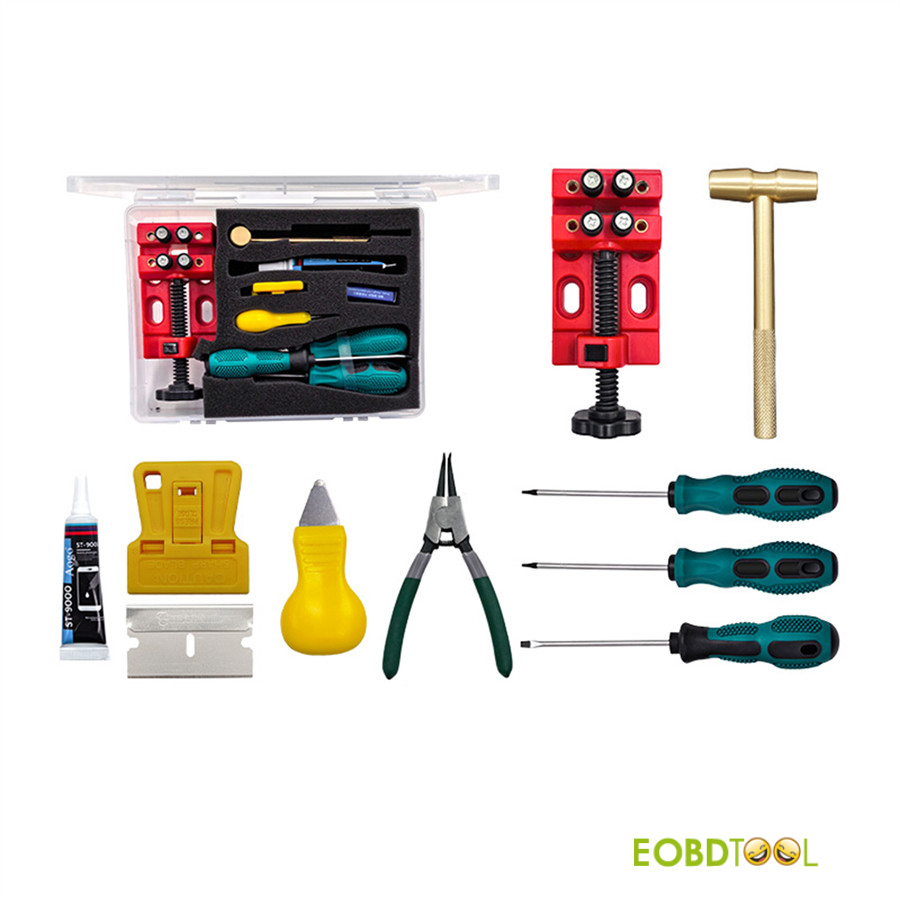
Comprehensive Component Breakdown
The kit features an all-in-one assortment of specialized instruments designed for every stage of the disassembly process:
- Casing Openers:Custom fixtures designed to separate the tightly sealed outer housing.
- Shell Cutters:Precision tools for cutting through the structural inner alignment tabs of the key.
- Screw Extractors:Specialized removal tools for hidden or proprietary key fasteners.
- Depth & Scraping Tools:Includes a tapping limit scraper and mechanical scalpel for controlled, micro-level plastic removal.
Vtool 5C 5D Key Cutting Kits Configuration List:
| Item No. | Adapters/Parts | Pictures | Quantity | Adapters/Parts Functions |
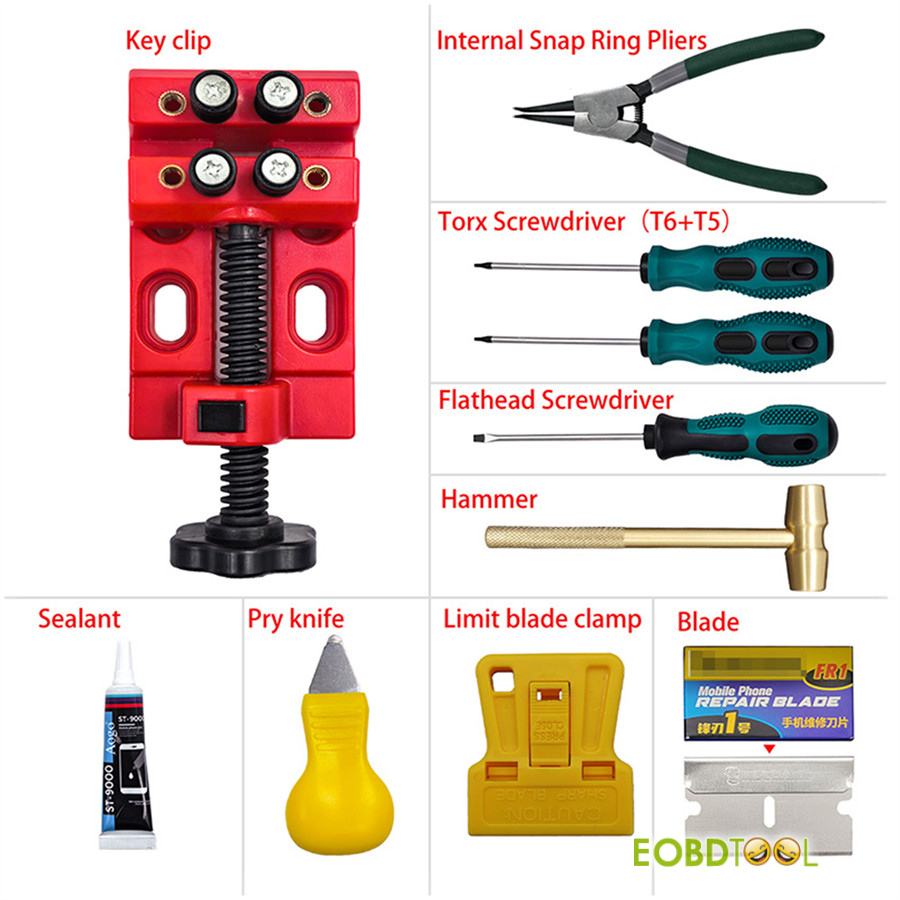
| 1 | key clip | 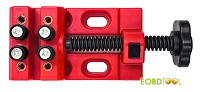 | 1PC | Applicable to connect the inner shell of 5C/5D key. |
| 2 | Internal Snap Ring Pliers | 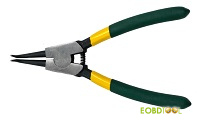 | 1PC | Applicable to opening the key casing. |
| 3 | hammer | 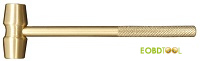 | 1PC | Applicable to tapping limit scraper and scalpel. |
| 4 | pry blade | 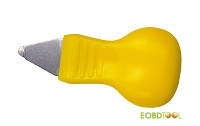 | 1PC | Applicable to opening the key casing. |
| 5 | Position-limiting scraper | 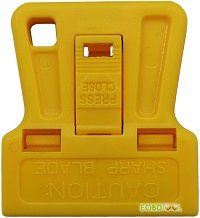 | 1PC | Applicable to cut the inner shell of key. |
| 6 | Scraper blade |  | 1PC | Applicable to cut the inner shell of key. |
| 7 | T6 Torx Screwdriver | 1PC | Applicable to unscrewing or tightening the screws on the key cover. | |
| 8 | T5 Torx Screwdriver | 1PC | Applicable to unscrewing or tightening the screws on the key cover. | |
| 9 | Flathead Screwdriver | 1PC | Applicable to unscrewing or tightening the screws on the key cover. | |
| 10 | Sealant |  | 1PC | Applicable to restore the key shell |
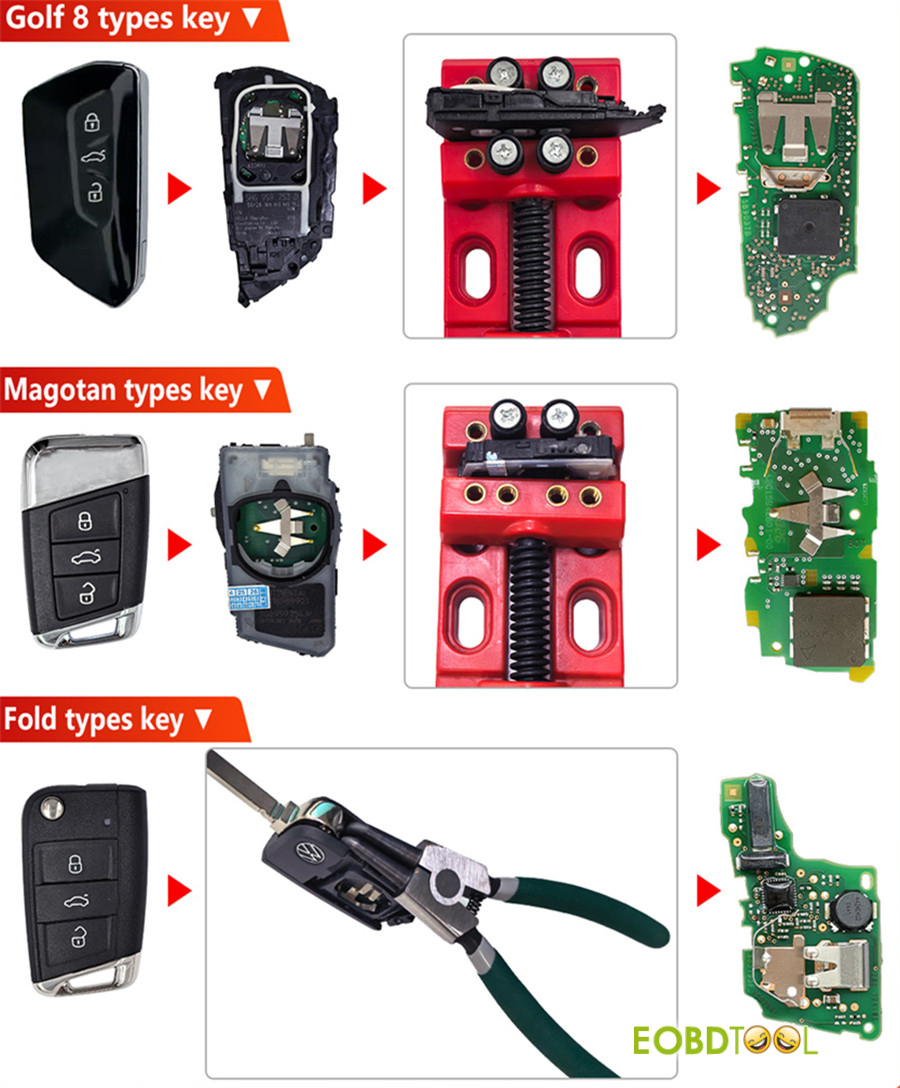
How to use for different keys?
- Golf 8 Style Keys(Next-generation MQB platform keys)
- Magotan Style Keys(Premium proximity smart keys)
- Foldable/Flip Style Keys(Standard blade-integrated remotes)
Core Benefits for the Workshop
- Minimizes Component Risk:Drastically reduces the costly mistake of ruining an expensive customer key housing—a frequent issue when using traditional pry tools or generic heat guns.
- Optimizes Bench Efficiency:Streamlines the teardown process into a fast, standardized workflow, allowing you to move from disassembly to data writing in minutes.
- Delivers a Professional Finish:Ensures a clean separation line and maintains structural integrity, so the internal board functions perfectly when transferred to a replacement shell or reassembled.